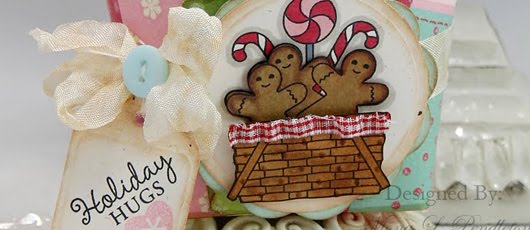
Baskets full of Waltzingmouse Goodness-Day 1 of the September Previews

Hi Friends! Today is Day 1 of the Waltzingmouse Stamps September Release previews. Claire, the Waltzingmouse DT & myself will be sharing projects over the next several days featuring FIVE new stamp sets that will be available for purchase at the Waltzingmouse web store on Sunday...

Read More

So Vintage - Shabby Chic

Hi There! Here today for the Friends of Waltzingmouse Stamps August Blog Waltz. This month Claire challenged us all to create a project based on a Vintage-Shabby Chic theme (as you probably have guessed this happens to be my fave :) For complete Waltz details please visit the The Play Room. Here is myVintage-Shabby Chic card full of FRUIT...

Read More

Glittered Kindness

Hi Friends! Happy Labor Day if you are celebrating here in the US :) Hope you don't have to work! I feel fortunate to have had most of the weekend off besides an 8 hr shift on Saturday. Just a quick lil' card here to share. This week, Sharon is challenging us all to pull out our JustRite Stamps & make some Glitter Magic for this week's JustRite Friday Challenge...

Read More

with Love...WMSC11

Hi There! Thanks so much to all who played along with last week's Waltzingmouse Sketch Challenge! So many fabulous projects! Here today with an all new sketch. Rather than making a card, I made a lil' home decoration wall hanging for my dear sister, Tina who takes care of my fur babies while I am out of town using the new Spellbinders™ Grand Nestabilities®...

Read More

Happy Birthday Mother...WMSC13

Hi Friends! Time for another Waltzingmouse Sketch Challenge! Thanks to all who played along last week, there were once again so many gorgeous projects!I made this card for my Mother-In-Law, Barbara, who will be celebrating her 79th Birthday on September 10th. I pulled out both the LF-127 Grand Scalloped Squares & the LF-126 Grand Squares die templates to create the 1st mat of the card then using the S4-127 Classic Scalloped Squares LG....

Read More

WMSC15

Hi Friends! Thanks so much for the sweet comment on my Halloween banner that I made for the Friends of Waltzingmouse Stamps September Blog Waltz. Here today to share this card I made for this week's Waltzingmouse Sketch Challenge. This card is rather Clean And Simple for me. I inked up Musical Backgrounds to create the background for the top layer & paired it with some pretty My Mind's Eye DP.....

Read More
Showing posts with label Copic. Show all posts

Father's Day Gift Set 43

Mona Pendleton | June 19, 2010 @ 12:36 PM | , ,

Hi There! Hope you are all having a great weekend :) I have a Father's Day gift set to share that I made for my dear husband Scott. Not only is he the BEST husband but he has been the BEST step-dad over the past 10 years to my children & of course, the BEST dad to my step-children :) He is the biggest supporter of my papercrafting hobby & would not be satisfied unless he received a homespun creation of sorts :)Scott has an enormous sweet tooth & one of his favorite candy is from See's - Victorian toffee. See's is now only offering the Victorian toffee during the Christmas Holiday season so the toffee-ettes are the next best thing! I made this card to accompany the gift ensemble.For sketch inspiration, I played along with this week's awesome Waltzingmouse Sketch Challenge #3, WMSC3. The Waltzingmouse Sketch Challenge site is now in full swing in week #3 already! If you are looking for some great inspiration & fun, be sure to check it out for yourself.

I inked up one of the images from the WM Very Vintage Labels No. 4 set, stamped it on a scrap of cork-board left over from one of my step-daughter's school projects, then simply placed a Spellbinders™ Nestabilities S4-190 Labels Four die template over the cork-board, adhered in place then ran it through my Wizard™. Scott will surely get a chuckle out of this recycled cork-board as I am sure it will jog his memory of making Meri's project :)

I used an oldie but goldie Spellbinders™ alphabet set (L2-01 Vintage U/N/P) paired with Spellbinders™ Copper Premium Craft Foil to cut the letters that spell DAD. I adhered those letters on a multi-layered oval frame. I pulled out my Copic airbrush system & sprayed the smaller oval for a soft look then layered that on top of an oval cut from Copper Premium Craft Foil with a S4-138 Petite Ovals LG die template.

If you click & enlarge the above photo, you can get a better look of the embossed & airbrushed decorative top that I made using I2-1009 Flourish Impressabilities™ template & a S4-117 Petite Scalloped Circles SM die template. In case you haven't seen my tutorial on how to do this, please feel free to click HERE.I made this little tag combining a few images from the Waltzingmouse Stamps Oven Fresh Gingerbread Joy & Very Vintage Labels No. 4 stamp sets.

Happy Father's Day to ALL Father's out there :)

That's all for today - Thanks for looking! Be Sweet!

Supplies Used:

Stamps: Waltzingmouse Stamps: Faux Fun, Oven Fresh Gingerbread Joy, Very Vintage Labels No. 4

Paper: pinkpaislee DP, PTI

Ink: Copic BG93 Green Gray, Clearsnap Black Ink, Ranger

Other: Spellbinders™ Nestabilities S4-190 Labels Four, S5-023 Mega Ovals LG, S4-140 Petite Ovals SM, S4-138 Petite Ovals LG, S4-114 Standard Circles LG, S4-116 Standard Circles SM, S4-117 Petite Scalloped Circles SM, W-001 The Wizard™, I2-1009 Flourish Impressabilities™, F-004 Copper Premium Craft Foil, cork board, ribbon, brads, button & twine from stash

post signature

Read More

Old Glory...JUGS33 55

Mona Pendleton | May 14, 2010 @ 8:57 PM | , , ,

Hi There! Hope you all had a great week & are ready for the weekend! It's time for another color challenge with Just Us Girls. Sweet Lisa chose this week's color combo for JUGS32. Hope you come join the fun!

Using some Spellbinders™ Premium Craft Foil, I created the 3D flag! In case you missed the embossing metal tutorial I previously shared & are interested in learning how to use this amazing product, please feel free to click HERE for complete details!

"Old Glory", All American, Memorial Day, The 4th of July (Independence Day), Freedom & ALL the men & women in the past, present & future who have served, are currently serving & will serve in the United States military come to my mind when I think of these 3 colors.

For a lil' added dimension, I paperpieced the basket, the tablecloth, the flag & the stars. Cutting out those lil' images is hard on the eyes! WARNING: Don't attempt to cut teensy weensy images using a sharp object in the wee morning hours! :) Ask me how I know?

For all the details, please visit the Just Us Girls challenge site & be sure to visit ALL the DT girls (found on my side bar) as well as LeAnne & Teresa! Once you have your project photographed, be sure to go to Just Us Girls and post a direct link to your project on our site. If you upload to on online gallery, please be sure to label your project as JUGS33.

Deadline to be considered for the weekly "Chic of the Week" will be 9:00 PM EST on Thursday, May 20th. Our Inlinkz tool will also close at that time. Our top pick "Chic of the Week" will be announced on Friday morning following the deadline.

That's all for today. I will be waltzing along with the Claire, Owner/Designer of Waltzingmouse Stamps, the Waltzingmouse DT & Friends in the Waltzingmouse Stamps Blog Waltz on Monday, May 17th continuing the 1 year Birthday celebration of Waltzingmouse Stamps :) A birthday isn't complete without a cake ;) Hope to see you then! Thanks for looking! Be Sweet!

Supplies Used:

Stamps: Stampin' Up, Papertrey Ink

Paper: K&Company DP, Papertrey Ink

Ink: Copic: E55 Light Carmel, R29 Lip Stick Red, T5 Toner Grey, W-1 Warm Grey, B29 Ultra Marine, Memento Tuxedo Black, Ranger Vintage Photo

Other: Spellbinders™ Nestabilities S4-114 Standard Circles LG, S4-250 Big Scalloped Circle SM, s4-241 Jumbo Scalloped Borderabilities™ Petite, Shapeabilities™ S4-081 Tags Five, W-001 The Wizard, Premium Craft Foil, embossing folders, buttons & twine from stash

post signature

Read More

Just Us Girls Challenge.... JUGS2 Snowman 23

Mona Pendleton | October 11, 2009 @ 9:44 PM | , , , ,

Hi Everyone! Happy Columbus Day to my American friends & Happy Thanksgiving to my Canadian friends :) If you have the day off from work, I hope you are enjoying yourself doing something fun! I would like to thank those of you who have visited the Just Us Girls Challenge site, signed up to be a girlfriend & have left a comment :) If you haven't already, I sure hope you do :) There are MANY fun things going on over there so I hope YOU join along! For those of you who are not aware, you DO NOT need a blog to play along in weekly challenges. All you need to do is establish a free account with a public gallery such as Splitcoast Stampers, SCS, take a picture of your photo, then upload it to your newly established gallery & post the link on the Just Us Girls blog using Mr. Linky!. If you need help with this process, by all means email me & I will be more than happy to help you :) My friend Julie, over at Julie's Open Window, sent me an email yesterday sharing her incredible news that the snow was flying in Illinois already! Yikes! Julie's news inspired me to make this snowman card! I had sooo much fun with this week's paper piecing technique for the Just Us Girls second challenge, JUGS2, & celebrating Breast Cancer Awareness Month with the use of PINK on my creation, I decided to make another card! For sketch inspiration, I used the CPS137 sketch & just flipped it sideways. For more inspiration, be sure to visit both the Just Us Girls & the Card Positioning Systems sites :) I'd love to know if you have given this paper piecing technique a try? Be Sweet!

Here is my paper pieced Snowman card:
The SU Kraft paper was embossed using the Cuttlebug snowflake EF. I inked up my snowflake image from PTI's Winter Swirls with VersaMark, then sprinkled on the embossing powder, heated with a small crafty heat tool!
With this Closeup pic, you can really see all the layers! I layered the hat,the 2 balls, the frosting & the cupcake wrapper! Soooo many pieces, sooo many textures.
Here are some of the supplies I used to make this card:
I wanted to show you how this lil' guy looks so cute, embossed & close up!
Ingredients Used: Stamps: PTI Winter Swirls, Hero Arts Cupcake Snowman, Hampton Art Think Pink stamp Paper: SU Mellow Moss, Whisper White, Pretty in Pink, Kraft Ink: Memento Tuxedo Black & VersaMark, Copic markers Dull Ivory E43, Warm Gray W-1, Africano E27, Colorless Blender 0, Warm Gray W3, Rose Pink R81, Green Gray BG93, Pink RV11 Sprinkles: Cuttlebug snowflake, Swiss Dots & Snowman EFs, Offray ribbon, EK Success punch, Filigree EP, generic brads, Carla Craft punch


Read More

Just Us Girls Challenge......JUGS2 33

Mona Pendleton | October 9, 2009 @ 6:54 PM | , , ,

Hi Girls! First, I would like to shout out an UBER sized Thank You to Pam, Kristin, Alicia, Dana, Lisa, Maria & Tracey for inviting me to join them on the new Just Us Girls Challenge blog Design Team!!! :) These girls are ALL amazingly talented paper crafters! Please be sure to visit each & everyone of their sites to take a peak at their creations! Can you believe it is Saturday already? That means it is time for my first official Just Us Girls Challenge. This week Pam, is the host & has challenged us to create our project using the paper piecing technique & in celebration of Breast Cancer Awareness Month, she included the option to use the color PINK. If you haven't already, I recommend you head on over to the Just Us Girls Challenge site for ALL the details & to see what the other Design Team girls have created to inspire you! Don't forget to pick up YOUR Just Us Girls Blinkie! I'd LOVE to see it displayed on your blog along with your entry for this week's paper piecing challenge! There is SOOO much FUN & EXCITEMENT happening over at the new Just Us Girls challenge site! I'd love to know if you have created something using the paper piecing technique? Be Sweet!

Here is my card for the JUGS2 Challenge using the paper piecing technique:

From a chickadee's eye view, you can see here where I cut out the wings, then pieced them on top of the stamped image using a lil' glue dot! Makes ALL 4 wings POP off the card! I also stamped the Think Pink ribbon image, cut it out & adhered it between the chicks!

First, I stamped the Hero Arts Decorative Bird images using Memento Tuxedo Black ink x2, one set on my card SU Whisper White piece of cs, the other set on a scrap piece. I colored in the main card piece using Copic markers Nile Blue, BG45 & Bougainvillaea, R43 & set aside. I colored in the other set of images, cut them out with a very sharp sissors, then adhered them on top of my main card image using lil' glue dots! Easy!

I hope you give this paper piecing technique a try & play along with us girls at Just Us Girls!!! :)

Ingredients Used: Stamps: Hero Arts Decorative Birds, PTI Everyday Button Bits, Hampton Art Think Pink Paper: Heidi Grace DP, SU DP, Whisper White, Pretty In Pink, Basic Black Ink: Memento Tuxedo Black, Copic Moon White, BG11, Light Camel, E55, Bougainvillaea, R43, Warm Grey, W-1, Yellow Green, YG03, Nile Blue, BG45, Peach, R32, Colorless Blender o Sprinkles: Spellbinders Scalloped Rectangle nestie, Making Memories brads, Offray ribbon

post signature

Read More

Mug of Warm Winter Wishes 23

Mona Pendleton | September 30, 2009 @ 2:28 PM | , , , ,

Hi Ladies! Thanks for all the encouragement especially with my Monster Madness forever growing set! You'll be seeing more of those lil' guys in the days to come :) Today, I am in the mood for some wintry creations. There is soooo many beautiful Christmas/Holiday papers hitting the shelves lately. On my last trip to the LSS, I came across this cute DP made by Imaginisce & the coordinating stamp which cost only 99 cents! I combined 2 challenges to make my Mug of Warm Winter Wishes set. This week Lauren's My Timeless Template Challenge 06, MTTC06, is to use ANY My Timeless Template & PACKAGE candy of some sort OR get inspired by the candy wrapper! I found inspiration in the wrapper of the lil' Ghirardelli Peppermint Bark squares & for sketch inspiration, I used Karen's Sweet Sunday Sketch for Challenge #37, SSSC37. I probably sound like a broken record but I have to share with you again how EASY & VERSATILE Lauren's templates are to use! They make GREAT, inexpensive gifts that you can decorate any way you like for any occasion! If you are looking for inspiration, I recommend visiting both Lauren & Karen. They have beautiful creations displayed on their sites, as well as their DT's! I would love to know if you are in the wintry - Holiday season yet? Be Sweet!

Here's my Mug of Warm Winter Wishes set:
I wanted something a lil' more subtle to break up all that busy-i-ness going on in the Imaginisce DP so I inked up my brayer with SU Bashful Blue ink, rolled it on the Sizzix Christmas snowflake embossing folder, then ran it through the Sizzix Big Shot Express machine.
To break up all that white around the Imaginisce Hot Chocolate image, I inked up the appropriate size dotted label image from the PTI Vintage Labels set with SU Bashful Blue ink.

Not only is the Outer bag that Ghiradelli Peppermint Bark candy gorgeous but every single lil' square is wrapped in beautiful candy cane striped paper! How inspirational is that? :)

I packaged 6 Ghiradelli Peppermint Bark squares in a small cellophane bag & that fits EASILY into ONE of the PTI My Timeless Template Milk Carton Made templates.

REMEMBER: Mark your calendar for Saturday, October 3rd! It is World Card Making Day & I will be celebrating by kicking off the holiday card-making season here at Cupcake's Creations! Don't forget to stop by to see what I am up to :)

Ingredients Used: PTI's My Timeless Template Milk Made Carton template Stamps: Imaginisce Hot Chocolate stamp, PTI Winter Swirls, 2008 Holiday Tag Collection, Vintage Labels, Stocking Prints Paper: Imaginisce Polar Expressions, SU Bashful Blue, Whisper White, Old Olive, Bazzill Pomegranate Ink: SU Basic Black, Bashful Blue, Momento Tuxedo Black, Copic Pale Olive YG95, Cardinal 59, Warm Gray W-1, Maroon E77, 0 Colorless Blender Sprinkles: Spellbinders Labels 1 dies, Michael's ribbon, Cuttlebug Snowflake die, Sizzix Christmas embossing folder & Scalloped Rectangle XL die, PTI buttons, Martha Stewart snowflake punch, SU tag punches

post signature

Read More

Pumpkin Pie Anyone? 31

Mona Pendleton | September 10, 2009 @ 5:33 PM | , , , ,

Hello Girls! It is hard to believe today is September 10th already. I met my son & his girlfriend for dessert today at MOJO's (a frozen yogurt cafe) :) It's a lil' hard to be in the mood for fall around here in Phoenix with the temps still above 100 degrees. With ALL of the craft stores full of Halloween, Thanksgiving & even Christmas supplies / decorations are you in the mood for fall yet? This week's color combination over at The Color Throwdown will surely shift your gears into fall mode, at least that is what they did for me :) Pairing Lauren's awesome sketch #35 with the color scheme from The Color Throwdown #59, I made this pumpkin gift set! Seeing those gorgeous pumpkins in that vintage basket from Papertrey's Vintage Picnic set makes me want to bake a pumpkin pie! Do you enjoy pumpkin pie? Thanks for looking!

Starting with a card base measuring 4 1/4" x 5 1/2" of SU Ruby Red cs, I layered a piece of SU Naturals White cs (4 1/8" x 5 3/8"), then a piece of SU Close to Cocoa cs (4" x 5 1/2"), & set aside. I inked up the brayer with SU Pumpkin Pie ink & rolled it right on to the Cuttlebug Autumn Type ef! Yep that's right! Repeating several times before sending a piece of SU Naturals White cs (3 7/8" x 5 1/8") through the Sizzix Big Shot Express. You get an entirely different looking piece of paper! It is like MAJIC!!! I adhered this new piece of "custom" DP to the other layers & set aside.

I inked up the PTI Vintage Picnic basket & pumpkin images with Memento Tuxedo Black & stamped them on a piece of SU Naturals White cs (2 1/4" x 2 3/4"). I stamped the tablecloth image, cut it out then layered it on a piece of cs punched out using a square scalloped EK Success punch. I then adhered these layers together, trimming off the excess around the top of the tablecloth image & pierced holes along the border. I colored these images in using Copic markers E43, W1, E27, R46, YG95, YR14, 0 Colorless Blender.

After coloring all the images, I positioned the tablecloth using a glue dot or two! Such a lil' detail makes that tablecloth "pop" right off the card! The main stamped piece is layered as follows: SU Ruby Red cs (2 3/8" x 2 7/8") & SU Close to Cocoa cs (2 1/2" x 2 3/4") that was cut using a Spellbinders Scalloped Rectangle. For a lil' touch, I pierced holes in the scalloped piece. The next two layers are the "Mona's custom ink embossed DP" :) (2 1/2" x 3 1/4") & SU Ruby Red cs (2 5/8" x3 3/8"). After assembling layers accordingly, I adhered to the cardfront & embellished with 4 generic brads. I threaded some PTI twine through several generic buttons & adhered with glue dots.

The PTI "happy harvest" image was inked up with SU Close to Cocoa ink, stamped on SU Naturals White cs (1/2" x 1 1/4"), layered on SU Ruby Red cs (3/4" x 1 7/8"), then SU Close to Cocoa cs (1" x 2 1/4"). I adhered it all together, punched a hole on both sides & ran a generous length of PTI twine around the card front and threaded it right through a Jo-Ann orange button.

For the card inside: I inked up a leaf image from the PTI Fall Elegance set with SU Close to Cocoa ink and randomly stamped the inside around the greeting. I made a small lil' pumpkin embellie by stamping the image, coloring & punching it out using an EK Success 1 1/4" circle punch then mounting it on a SU Close to Cocoa 1 1/2"cs scalloped circle via a Fiskars punch.

I just had to make a coordinating PTI My Timeless Template Tucked Away gift box designed by Lauren! These lil' templates are sooo easy to create & very versatile! Useful for Any Occasion! :)

I think it is pretty self explanatory how I made this one "my own"! The Mona's custom embossed DP is the same as on the card! I placed two XL We R Memory Keepers eyelets on the top using the Crop a Dile 11, ran a piece of PTI cream saddle stitched ribbon through, tying knots on the underside. You probably know by now, I LOVE ribbon! Using generous lengths of PTI twine, Offray & American Crafts ribbon, I made a bow. With the SU tag punches I created a greeting tag. I inked up the "Just for You" greeting from the PTI 2008 Holiday Tag Collection with SU Close to Cocoa ink & stamped the tag then repeated with the same leafy image previously used. Finished it off by coloring the leafs and fastening a generic button with some PTI twine.

I hope this all made sense to you?! If you have ANY questions, please feel free to e-mail me!!! I'd love to know if you enjoy Pumpkin pie, Pumpkin bread or muffins? (I prefer Pumpkin bread with chunks of dried ginger!!!) YUMMY :) Be Sweet!

post signature

Read More

Monster Madness 39

Mona Pendleton | September 7, 2009 @ 2:57 PM | , , , ,

Hi Ladies! I hope everyone is having a fun filled Labor Day weekend if celebrating here in the US :) I am enjoying just having the day off from work! I was hoping to get sooo much accomplished but my creative wheels were refusing to spin Friday & Saturday! :( UGH! I could not make this certain DP "work" for my Monster Madness project, wasting TWO days trying to put something together with out any luck. I drove to my sister's, (Tina), house to pick her up & head to the local scrapbook store at 7 pm (located 25 miles away)! I was in search of some bright colored / fun Halloween paper rather than the drab colors I had on hand. YIPPEEEEE!!!! I found it :) Tina & I were on our hands & knees sorting through 1000's of buttons that we dumped on the floor looking for "the right" ones! Tina is my partner in crime & soooo supportive with ALL my crazy antics! The scrapbook store closed at 9 pm but they were holding a crop night, so they allowed Tina & I to stay & play with their buttons! :) I left that store skipping out the door with my goodies in hand :) Have any of you had that sort of thing happen? You simply find it impossible to make anything work? I find that sooo incredibly frustrating! :(

I bought this cuuuute Recollections Monster stamp set at Michael's & was dying to make some Halloween invites / card with! These Monsters are way too precious to put with any ole' paper! I am calling this set of cards "Monster Madness". I made the series as my entry for the Be Inspired #47 Cuttlebug Challenge. You see, over at the Cuttlebug Challenge site, they are celebrating their 1st birthday! Keeping with the party theme, the challenge is to Invite your guests to your party! We have to decide on a theme that the party will be, and create an invitation using any embossing folder. I chose a HALLOWEEN theme. Aren't these monsters darling? I'd love to know if you think these monsters are sweet or frightening? Be Sweet!

Ingredients Used:

Stamps: Recollections My Little Monsters, PTI Spooky Sweets 11, Inkadinkado Invitations

Paper: My Mind's Eye DP, SU More Mustard, Certainly Celery, Really Rust, Very Vanilla, Basic Black

Ink: Memento Tuxedo Black, SU Sahara Sand, Basic Black, Copic markers YR21, E08, YR14, W3, YR24, G40, 0 Colorless Blender

Sprinkles: Cuttlebug Tiny Bubbles & Tiny Mosaic Texture EF, Spellbinders Scalloped Circle, Oval, Rectangle & Square nesties, EK Success oval & circle punches, SU tag punches, Offray ribbon, generic twine, buttons & brads

post signature

Read More


Backup Blog Copyright © 2010 Prozine - Designed by Lasantha customized by Scott Pendleton for Mona
Banner graphic elements courtesy: House of Three
Home | RSS Feed | Comment RSS